|
|
|
|
|
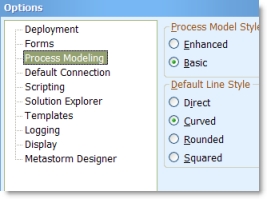
We have a couple of choices
regarding the Process layout.
One is the Model Style. This is
a toggle between Enhanced and
Basic.
The second is not a setting but
a default for the line style of
new lines. System-drawn lines
ignore this, but that may be
fixed later.
|
|
|
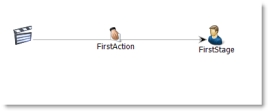
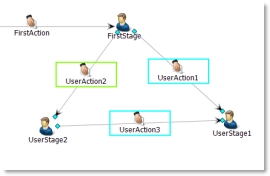
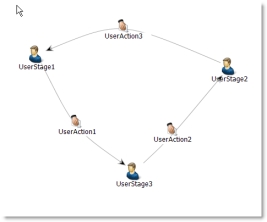
This is the default ‘Basic’ Model
style. Analysts will typically
use this as it is less cluttered.
This is also the style we are
used to.
Notice that the Action icons are
now larger, which is a welcome
reversion.
|
|
|
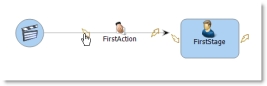
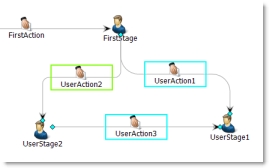
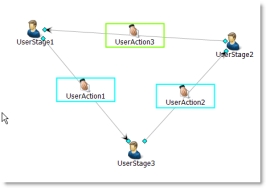
This is the ‘Enhanced’ style.
The differences are that you
have ‘quick-launch’ icons to
jump to the Visual Scripts for
Actions and Stages, and shapes
for Stages.
|
|
|
This replaces the need to
select the Stage and then
select the Visual Script (see
forthcoming section) from the
properties box.
|
|
|
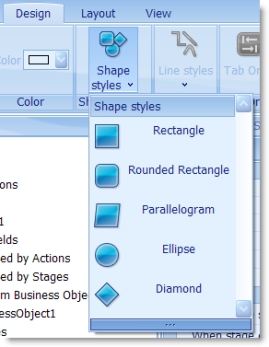
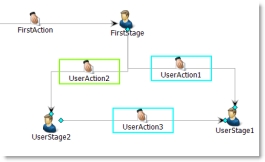
The shapes for Stages can be
selected from the Design menu,
or from the Context menu.
These Stages do not represent
anything apart from the graphic.
We feel that as the ‘Enhanced’
style is really for Developers,
and the ‘Basic’ style is more
suited to Analysts, the
inclusion of shapes in the
‘Basic’ style would be far more
appropriate. Analysts will care
about visual aspects, not code,
and Developers will care about
Code not visual aspects.
|
|
We also cannot see the ‘Enhanced’ style being employed for
documentation as it is too ‘busy’. Thus the shapes become
useless in our view. Pretty, perhaps, but useless as they are.
What it really needs is the shapes to be used in the ‘Basic’
model, but allow ‘None’ to be selected as well (in case you don’t
like them). It is a good differentiator of Stages from Actions.
|
|
|
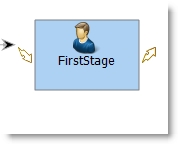
This is the Rectangle shape,
|
|
|
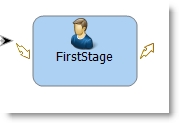
The Rounded Rectangle shape,
|
|
|
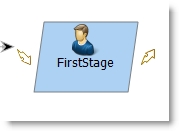
The Parallelogram shape,
|
|
|
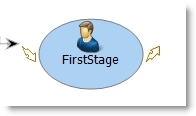
The Ellipse shape
|
|
|
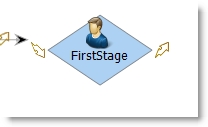
And finally the Diamond shape.
|
|
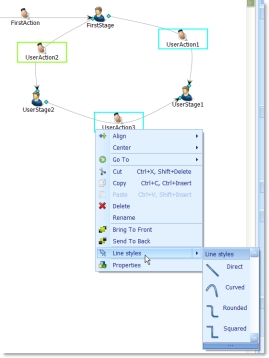
One puzzling omission is the lack of Shape selection from the
Context menu. You can select a Line style from the Context menu
for Actions (see below), but not a Shape style from the Context
menu for Stages.
|
|
|
|
|
Lines also have a Style. We
use the Curved style at all
times for a number of reasons.
Mostly because it is the only
one that is unambiguous in all
eventualities. The others may
not be, as we shall see.
|
|
|
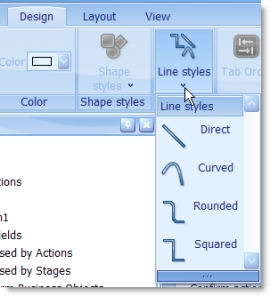
The Line style may be selected
from the Context menu or
Design menu. You can apply
the same style to multiple lines
by multi-selecting them and
selecting a style from the
Context menu …
|
|
|
or from the Design menu.
|
|
|
Here the Direct style is used.
|
|
|
This is the Rounded style,
|
|
|
And the Straight Style
|
|
|
One nice feature of the
Rounded and Square styles is
that the lines ‘jump’ over each
other when crossing. To the left
is an extreme scenario.
|
|
|
|
|
|
Although these new line styles are attractive, in all but the
Curved style (what we used to have) we get significant problems
that will force us not to use them, unfortunately.
|
|
|
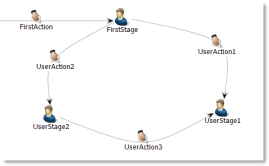
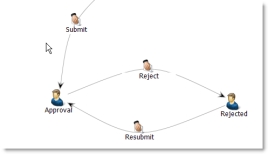
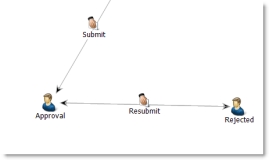
Imagine the scenario to the
left. Not an uncommon one, we
feel.
|
|
|
If the Straight style is selected
for all these lines, look what
happens.
One action has completely
overshadowed the other, not
even leaving an indication it is
there. The Principle of Least
Astonishment™ is thus violated.
|
|
|
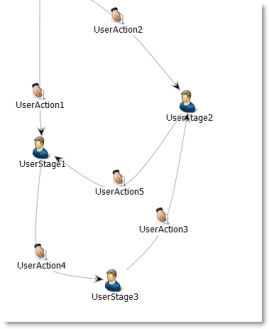
We feel that the Rounded and
Straight styles suffer from
serious flaws too.
Take the fairly basic map to the
left.
|
|
|
When we change this to the
rounded Line style, it becomes
impossible to tell in which
direction many of the Actions
are set. This will definitely be a
potential source of confusion,
and we would not suggest
using them.
|
|
|
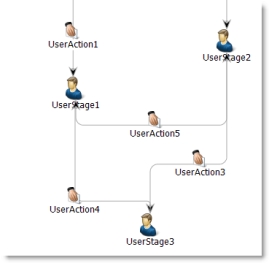
The same is true of the
Straight Line style.
A nice idea, but it will not work
as is, I’m afraid. Back to bendy
lines!
|
|
|
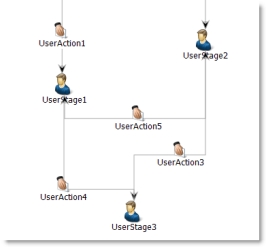
Although we feel the Direct
style is flawed for general use,
it does have one very nice
ability. Starting with the layout
on the left, we decide we want
to move things around.
|
|
|
First we change the line styles
to Direct.
|
|
|
Then we move the Stages
around, before changing the
line style back to Curved. Note
that we never moved any of the
Actions ourselves.
I think you can see that we
have avoided the need from
previous versions to move all
the Actions around to align
correctly with the new Stage
layout, which is a big
improvement.
|
|
|
|
|
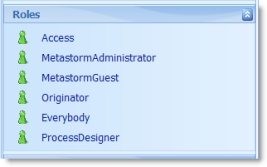
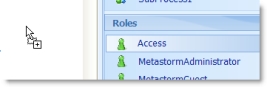
Roles, as well as being
employed in the same way as
they used to be, can be added
to the Process map as
‘Swimlanes’.
|
|
|
You just drag and drop a Role
onto the Process map,
|
|
|
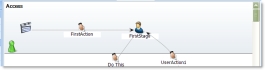
And a Swimlane is created.
|
|
|
You can add as many as you
wish in this way.
|
|
|
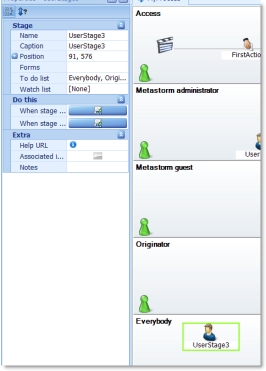
The way Stages are assigned to
lanes is to drag them to the
lane.
|
|
|
We notice that moving on the
same lane works too.
|
|
|
This adds the Role to the to-do
list of the Stage.
|
|
|
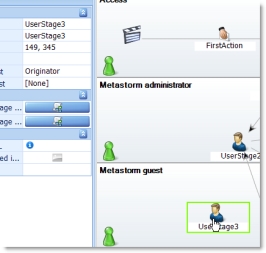
Dragging to a lane adds the
Role that corresponds to that
lane,
|
|
|
and dragging off that lane
removes it.
|
|
|
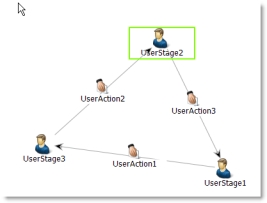
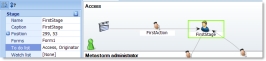
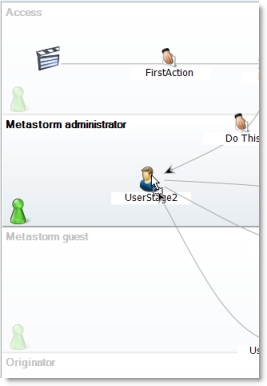
Notice that when dragging a
Stage, the lane that will be
used if you drop the Stage is
highlighted while the others are
dimmed.
You can also change the icon of
the Swimlane, so you can
represent different roles with
suitable pictures, for example,
should you wish.
|
|
|
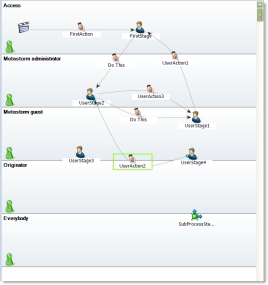
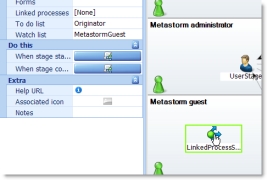
System and Linked Process
Stages do not change their To
do list but their Watch list
when being moved from lane to
lane. This makes sense for a
System Stage, although we are
a bit dubious about the Linked
Process Stage.
|
|
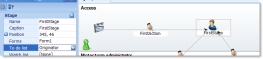
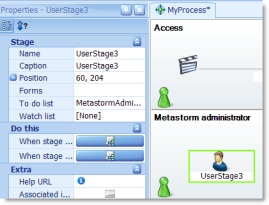
The most obvious problem we have found with the Swimlanes are
that dropping a new Stage onto a Swimlane does not select the
Role. In fact, the default To do list item of Originator is set,
meaning you have to deselect it.
If that was fixed it would make the Swimlanes much more usable,
but as it is you need to jump a few hoops to make it work as it
really should, at least not to violate the Principle of Least
Astonishment™, anyway.
|
|
|
|
|
|